![]()
Introduction
Whether you find yourself in an emergency situation or simply enjoying some time in the great outdoors, energy bars are a fantastic addition to your diet. They offer several advantages: they are lightweight, easy and quick to eat, and can be conveniently stored in your pockets, backpacks, or even the tiniest pouches. Energy bars have become a popular choice for fast food on the go, and they are much healthier than candies or other sweet treats. They also have a long shelf life, so you don’t have to worry about them going bad. You can find them almost anywhere, from large supermarket chains like Walmart to gas stations and even vending machines.
However, have you ever considered making your own energy bars at home or while out in the woods? Not only can this help you save money on packaging costs, but it also gives you the opportunity to produce them in large quantities for yourself and your family. Let’s explore some of the benefits of making survival bars yourself:
Benefits of Making Survival Bars Yourself
-
Choose Your Ingredients: When you make your own energy bars, you have complete control over the ingredients. You can select high-quality, nutritious components that suit your taste and dietary preferences.
-
Make in Bulk: By making energy bars yourself, you can create large batches of baking sheets. This allows you to have a steady supply of bars whenever you need them.
-
Customize the Shape: You can cut the bars into various shapes such as squares or rectangles. This flexibility enables you to fit them into even the narrowest parts of your gear.
-
Choose Your Wrapping Method: You can decide how to wrap your bars based on your preferences. Options include kitchen film, aluminium foil, or bamboo boxes.
-
Save Time: Instead of purchasing energy bars elsewhere, making them yourself saves time and effort.
-
Involve Your Family: Making energy bars can be a fun activity that involves the whole family. It’s an opportunity to spend quality time together while preparing for outdoor adventures.
Investing in the right choices is an investment in your health and future.
Don’t Let Blisters Slow You Down!
Discover the ultimate solution with ArmaSkin Anti-Blister Socks. Designed with advanced friction-reducing technology, these socks keep your feet dry, comfortable, and blister-free – no matter the challenge.
Shop NowIn this article, we will explore how to make survival bars with the best selection of ingredients in terms of energy and calories. We will also learn how to bake granola bars at home and in the great outdoors.
Ingredients and Energies
When selecting ingredients for your survival bars, it’s important to be mindful of what you need to regain energy and protein when you find yourself lacking. Vegetal proteins are a great and precious resource when outside, and you only need a few of them to regain vigour - either physical or mental - you must have to face different activities.
Let’s now look at some essential raw materials for our survival bars.
Nuts
Nuts are traditionally synonymous with energy because they contain a high level of fat. In fact, all types of nuts have all major macronutrients, such as fat, protein, and carbohydrates. Nuts also contain a good amount of total protein, which is beneficial for vegetarians.
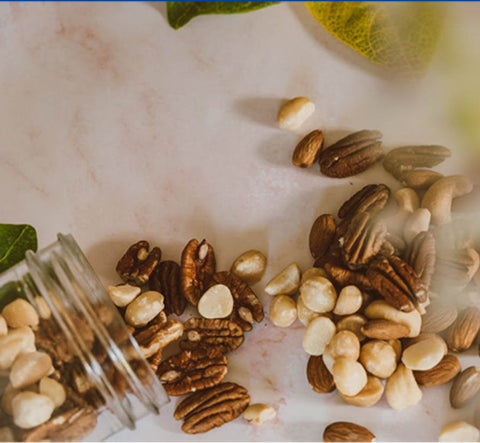
Nuts are also a good source of phosphorus, magnesium, copper, folate, vitamin E, and they are extremely rich in fibre, which is beneficial for digestion.
Fruit
You can add any kind of fruit you want to your survival bars. The most popular dried fruits include blueberries, blue raspberries, currants, apples, pears, bananas, pineapples, and figs. You can also try new flavours by adding the fruit you love the most. Even oranges, tangerines, citrons, lemons, and limes can be very good.
Fruits and Vitamins
Each fruit contains specific vitamins, so you can prepare energy bars from scratch by selecting the fruits that provide the vitamins you need. You can also add vegetal protein, Vitamin A, B, and C to your bars.
To process your fruit, you can use a good food dryer to cut it into thin slices or tiny pieces and mix it into the pastry. I suggest organizing your food storage by dedicating a box to contain all the ingredients you need to make granola and survival bars. This way, you know exactly what you need to prepare survival bars with Vitamin C (with citrus, etc.).
Grains
You have plenty of choices when it comes to selecting grains for your pastry. The most commonly used grains are oats, oat bran, puffed rice, puffed millet, puffed barley, puffed spelt, and puffed kamut.
Seeds
Some companies have started adding seeds to their energy bars. However, our digestive system isn’t fit for them, so I suggest not overusing them. Chia seeds and black/white sesame seeds are the most commonly used.
Thickener
To keep your pastry together and well blended, you need a thickening agent. You can use organic options such as coconut oil, sesame oil, maple syrup, honey (in all varieties), peanut butter, almond butter, pistachio butter, date palm oil, or jaggery (which is more suitable for granola than processed cane sugar).
How to Make Survival Bars from Scratch - At Home!
“Let food be thy medicine, thy medicine shall be thy food.” – Hippocrates
In addition to the benefits we covered in the previous paragraphs, you will be surprised by how fast and easy it is to prepare your granola pastry from scratch. Besides the essential ingredients, all you need is a fridge (or an oven) and no more than twenty minutes of your time. And I am speaking for all the customizable recipes you have in mind!
Preparation
- Put all the ingredients of your choice in a bowl, respecting the proportions between nuts, fruit, grains, thickener, and seeds. The proportions depend on the dimensions and numbers of the bake sheets you have at your disposal.
- Mix them together to create a pastry.
- Press this mixture inside a baking dish.
- Store it inside the fridge for at least 3 hours. Later on, you can cut them into slices or small pieces as you please.
- Energy bars can last up to five or even six days in the fridge. You can also freeze them!
- In case you prefer to bake them, keep them in the oven at 356°F for no more than 10 minutes. Check their baking repeatedly and carefully to avoid spoiling them.
- Once out of the oven, let them cool for at least one hour. This second preparation may turn them a little bit crispy, which I personally prefer.

How to Make Survival Bars from Scratch - In the Great Outdoors!
“You don’t have to eat less, you just have to eat right.” – Unknown
What if you want to prepare your survival bars in the great outdoors? If you have a fire, you can definitely make it. All you need is a collapsible bowl, a spoon, and an upper grill to make sure they won’t get burned. A few minutes of preparation and at least 60 minutes to cool down, and they are ready to be cut into pieces or broken with your own clean hands!
Conclusion
“The food you eat can be either the safest and most powerful form of medicine or the slowest form of poison.” – Ann Wigmore
We don’t have to be super chefs to make these survival energy bars from scratch. By using a balanced amount of nuts, dry fruit, sugar, and fat, you will have all the essential elements to create delicious, healthy, and energizing bars. You can also add some dark/milk or white chocolate chips to enhance the flavour.
Add your creativity and go for it! Making survival bars could not only be a good investment but also a way to share your knowledge with the community of preppers out there.
About the author: Kyt Lyn Walken
- Certified Wildlife Conservation Ranger at Conservation Ranger Operations Worldwide
- Official Representative & Instructor at Hull’s Tracking School
- Directora de Rastreo Humano por Dynamic Tracking (Spain)